
We're two weeks removed from the drop of the BIG Spring FAQ, and...wow...what a game changer it was. Some people are even calling this Edition 8.5 because of how much changed. No army escaped the changes completely unscathed, but some came out better than others (and some much worse...sorry Blood Angels...). Today, I'm going to tackle my favorite army...the T'au Empire.
T'au were the last codex released before the FAQ dropped so they received their faction specific FAQ at the same time that the entire game was changing. The three biggest changes, outside the adoption of the first set of Beta Rules, were the "Rule of 3", the changes to how Deep Strike works (Beta Rule), and Battle Brothers (also a Beta) for army construction. This will be a bit of a long post as there's a lot to discuss, but hopefully the content will be worthwhile! As always, I love the feedback so don't hesitate to drop a comment. Love it, hate it, missed something? Let me know!
For those that haven't read those changes yet...do you even play Competitive 40K? I kid, I kid...sir, put down the pitchfork...it was a joke. Anyways, if you haven't read the changes yet...head over to Games Workshop's website and download the most recent FAQs. They're always good to have on hand and they're free. The gist of the changes are as follows though:
1) Rule of 3 - Organized Play now has a hard cap on the number of selections a specific data slate can take within an army. The exception to this is Troop choices and Dedicated Transports. Functionally what that means is that for a 2000 point tournament game, you can only have 3 of any given entry from HQs, Elites, Fast Attack, Heavy Support, Flyers, Fortifications and Lords of War.
2) The Deep Strike Beta Rule now requires that half of your units AND Power Level must be deployed on the field at the beginning of the game. In addition, units that can arrive as reinforcements can only arrive in your deployment zone on turn 1. Turns 2 and 3 they may arrive anywhere on the board (subject to their rules).
3) Battle Brothers really wasn't relevant for T'au as we currently don't have a broader keyword to unify under. But the rule is important in the competitive arena as detachments can no longer be made off of the Imperium, Chaos, Aeldari, Ynnari or Tyranids keywords. This essentially kills the soup detachments that had become so prevalent in the competitive meta.
Also of note, Battalions and Brigades got additional Command Points! They were bumped up to 5 and 12, respectively. This was done so that more elite armies had an incentive to bring their basic troops in order to gain access to more of their stratagems. Take a look at a pure Custodes list along with their stratagems and you'll understand why this was important. They are an army with a lot of really good stratagems, but their entry cost is so prohibitive that there was no real incentive to bring the basic Custodes Troop options. Now there's a decent reason to include three units of them, or at least an Imperial Guard Battalion to act as the CP battery. (Most players seem to trend this way, but I'm a purist and hate mixing factions. Imperium mixed factions seem to be the most competitive though so check it out if you're of the Imperial persuasion.)
Now I'll dive into how these changes (among others) affect the T'au as we move forward and I will also touch on my opinions and tactics now that the codex and FAQ have had time to settle in.

T'au After the FAQ
It's weird to think that over a month has passed since the Codex dropped and that almost a month has passed since the Spring FAQ. As I mentioned above, T'au were in a relatively unique place along with Necrons as we were released in tandem with the FAQ. The T'au community was up in arms about the limitation of one Commander per detachment in Matched Play, which would have effectively killed the "most competitive" T'au index build while not limiting any other units in the game. GW surprised many people by limiting all non-Troop/Dedicated Transports to 0-3 for 2000 point games in organized play. This change effectively killed the majority of spam armies that had been dominating tournaments.
While many have called this heavy-handed when taken in conjunction with the other Beta Rules, I actually really like this as a change and think that this is of immense benefit to T'au players. When the Codex released, it had one of the most polarized review periods of any book I've seen in 8th Edition. Ironically, many T'au players were distraught by what they felt was a sub-par Codex while many non-T'au players lauded it as a solid to strong book with a lot of synergy and tools. I was one of the T'au players that fell in the latter group.
The thing to keep in mind when building a T'au army is that "the whole is greater than the sum of its parts." What I mean by this is that we have a book that has a lot of units that are simply 'good'. A few units that I would consider great, and the Coldstar as our one truly elite unit. On the surface, there aren't any units that are auto-takes. This is our saving grace as ironic as that may sound. Our Codex was never built to be spammed (despite the previous existence of Commander Spam), no single unit is truly good enough to be able to carry the battle against every other army out there so we have to take a variety of different units. That plays directly into our great strength, synergy. The T'au are meant as a combined arms army, you can tell this by looking at a few indicators 1) how many support units we have 2) the stratagems where a unit gives up its shooting to improve the output of another unit and 3) the existence of Markerlights and the benefits they provide.

Rule of 3
As I mentioned above, T'au dodged the worst of this one as the Commander limitation effectively already stopped the spamming of our best unit. Apart from that, the army really didn't lend itself to being spammed in the first place. If you read my Tournament Report from the Lost Knowledge GT, I was running 6 units of Stealth Suits. This could easily have been consolidated down into 3 units of 6 rather than 6 units of 3 without sacrificing too much of their utility. Other examples that come to mind include a recent article from FLG where a T'au player won a GT in Scotland on the back of 5 Riptides and Shadowsun. His article broke down the event and strategy behind the Riptide Wing and his revised list with 3 Riptides and Broadsides was arguably more potent than the GT winning list.
By and large, I think this rule will be excellent for tournament play and provide a wide diversity of lists that all have the potential to be successful.
Deep Strike Beta
This is another change that I feel largely helped T'au more than hurting them. This effectively protects most armies from the devastating Turn 1 alpha strikes that have been prevalent in 8th Edition. Particularly, first turn charges and additional moves out of Deep Strike because of psychic powers, stratagems or other means. This provides T'au a lot of protection on Turn 1 and a great opportunity to properly fill the board and block off the opponent's drop zones. Between Stealth Suits, Pathfinders/Kroot, and fast moving units, T'au are very good at filling the board and plugging holes that could be occupied by Deep Strikers.

We're not unscathed here though. The Crisis Bomb that many people had been working on is now relegated to a Beta Strike tool. The big issue here is that the price of a 3 CIB equipped unit of Crisis Suits is very high, probably prohibitively so if you're running a max sized squad (almost 1000pts). I don't know that this was going to be viable in a tournament anyways, despite the punishing output it's capable of, so I don't know that we really lose much here anyways. I think the way to utilized this concept now is a smaller unit of Crisis suits (3-5) that can be dropped into your own zone Turn 1 to repel forward charging elements, or that same 3-5 suits being held until Turn 2 to go after down field objectives and backfield units.
Winners/Losers
Overall, T'au improved immensely with the release of the Codex and the subsequent FAQ. The following are units that I believe can be slotted into any army and ultimately make up my competitive lists.
Winners
As I said, I believe T'au largely improved across the board so these are somewhat arbitrary. However, the following three entries are the units at the top of my list for inclusion into any competitive build I attempt to make.
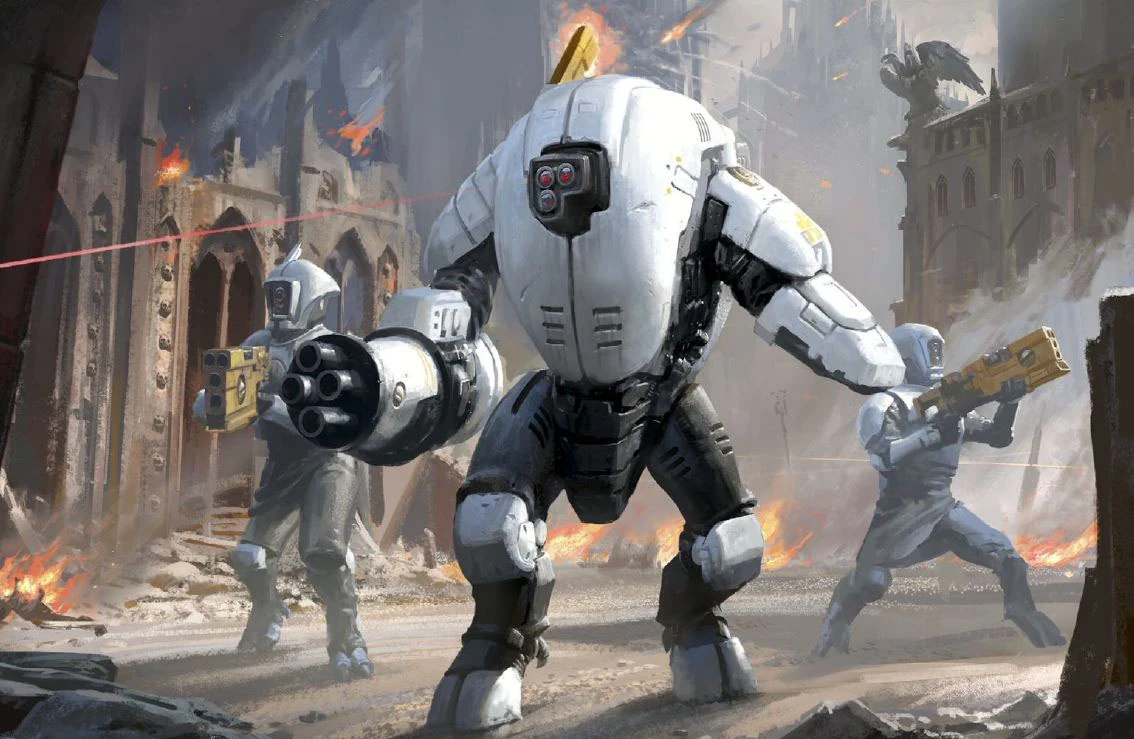 Stealth Teams - I'll start off with arguably my favorite unit. Stealth Teams are one of those units that fill an interesting role within the T'au army. Equipped only with a burst cannon (maybe Fusion Blaster) for offense, they aren't that scary of a threat to anything tougher than light infantry. But that's not why you take these guys, you take them for their ability to infiltrate into No Man's Land with their deployment and their ability to survive once they're there. The native -1 to hit is one of, if not the, strongest abilities in the game right now, and they have it against both shooting and melee attacks. Couple that with the fact they're infantry with a 3+ armor save and 2 wounds, and you have an extremely resilient unit. They also have Fly which is another rule competing for "Best in Game." This is my first and second question when evaluating a T'au list: where are your Stealth Teams? How many did you take in each? There are ways to beef them up (Velocity Trackers, Shield Generators, and Advanced Targeting System all come to mind) but the stock unit is perfectly capable on its own. I'm convinced there's a strong build featuring a Ghostkeel, Vior'la and Wall of Mirrors but I just haven't had the chance to practice and see if it will work...soon though...
Hammerheads - Particularly Longstrike and Ion Cannon Hammeheads, these got a nice point reduction and an increase in shots and damage output with the Codex update. There's not a whole lot to say about these outside of the consistent damage output. There is level of randomness as they get D6 shots on the overcharged profile, but statistics usually won't hurt you too badly here. They're one of the few T'au units that can easily reach BS2+ with reroll 1s. That's a 97% hit rate with a S7 or S8 weapon dealing 2 to 3 damage (depending on profile). That's really good no matter how you slice it.
Losers
Again, this is somewhat arbitrary as I believe you can play any of the units below, but some units did lose a bit of their luster as a result of the Codex and FAQ.
 Crisis Suits - There's no way around it, Crisis suits are too expensive, too fragile, and too one dimensional. Don't get me wrong, I love that dimension and I love the role they play but in order to maximize their offensive output you're going to be close to 100 points per suit. With the change to Beta Rules, they can no longer perform an Alpha Strike role and are relegated to more of a counterpunch. I don't think this is necessarily a bad thing, but their niche role got even smaller. You can still make them work, Dropzone Clear is a great stratagem and the ability to take Cyclic Ion Blasters and benefit from Command and Control Node makes their offensive output the best in our arsenal. It's simply a huge investment for a massive swing. If you miss with that swing, you leave yourself open to what will almost certainly be a devastating counter that will likely cost you the game.
Commanders - Did they get worse individually? No, not at all. Did their role in the army diminish? Yes, absolutely. This is why they're here. The limitation of one Commander per detachment strikes me as just a touch heavy (I think it should've been 1 per number of detachments) but I don't disagree with the move to limit them. It needed to be done, but it does cause more far reaching issues as T'au are very limited on non-Commander HQ choices to begin with. More so now that the Rule of 3 is in play.
*Caveat. This criticism does not extend to the Coldstar Commander. That unit improved immensely as its weapon options were opened up to match the standard Commander, and it's still able to make a Turn 1 Alpha Strike by virtue of its 40" advance.*
Tactical Drones - This one will likely surprise some, but hear me out on this one. Savior Protocols is one of the best mechanics T'au have and should be utilized as often as possible. However, the change away from it being an automatic pass off of the wound to requiring a 2+ means that there will be times the drone fails to intercept a devastating hit. Consider also the points hike on Gun Drones to 12pts apiece and you have to start asking the question if they're still worth the price. Certainly not in the same numbers as before (because math...) but I tend to find myself gravitating towards shield drones anyways. Having the 5+ Feel No Pain is incredibly good for the longevity of the unit and the battle suits they protect. It's still frustrating that Drones give up Kill Points as they're usually brought for the sole purpose of dying to protect your suits, but ultimately I can't complain too much as the survival of a Riptide will almost certainly be worth giving up a Kill Point off a unit of Drones.
**Caveat. YOU. STILL. SHOULD. USE. DRONES. SAVIOR. PROTOCOLS. IS. TOO. GOOD. NOT. TO. USE.**
Tactics, Roles, and Archetypes for the New Meta
You can probably glean a decent bit from the Winners/Losers section as to what I see as being the go to units for a tournament build. Yep! All three of the Winners and the two Caveats listed in the Losers make my cut. The rest of the codex (including the Losers if we're being honest) are still in play and can be taken pretty freely without feeling bad about your list. A list with a small Crisis team actually made the Top 8 at the Alamo GT recently (80+ players), so there is a place for even our "worst" units. At this point, let's talk about some tactics and the units that we will use to best accomplish them.
Starting with your firebase and radiating out, you should have:
1) Strike Teams - these guys will be in tight with the big stuff. They're providing a combination of For the Greater Good and board spacing to keep deep strikers out of your DZ. They're solid units in their own right, a good combination of potent firepower, buffs and price make these guys an attractive option for filling out battalions and holding your home objectives.

2) Scouts - this is where your Kroot and Pathfinders come into play. Their pregame 7" move is fantastic for pushing the frontline out and forcing your opponent to engage cheap skirmishers rather than your expensive units. We're largely talking in terms of close combat and mid range shooting. Lascannons and long range shooting are going to be the weapons that will most likely cause T'au headaches. (Hint: build your shell and eliminate their ranged shooting, it'll probably be a good day if you're forcing the opponent to engage your troops in their zone than in yours.) These guys are a filler force. They're trying to be the link between your Infiltrators and the firebase, a latticework of board control that forces your opponents into certain areas.

3) Infiltrators - by far my favorite pieces, this is where your Stealth Suits and Ghostkeels fall. These units can deploy very far forward, on the edge of the opponent's DZ in the case of the Stealth Suits. As I mentioned above, they're insanely hard to remove for a unit of their statline. Opponents typically don't realize this and won't devote nearly enough shooting to get rid of them. On the flip side, the Ghostkeel will almost certainly draw a lot of fire Turn 1. My opponents remember the Optimized Stealth Cadre from 7th edition and attempt to remove the scary stealth monster as soon as possible. Equip it with a Shield Generator and deploy it midboard and you'll have a very tanky unit that will take up the center of the board and likely eat the majority of your opponent's shots turn 1. In Summary, these guys will hold the frontlines much longer than they have any right to (-1 to hit and 2+ save in cover for the Stealths), and will block off big stretches of battlefield for several turns.
4) Deep Strikers and Sweepers - I think this is where Vespid fall. These guys won't be part of your initial deployment but will arrive Turn 2 to fill in for your scouts that have likely been shot up Turn 1. Not only do they have a devastating counter punch when moderately supported, but they're infantry so will gain the benefit of cover from being in Ruins and most other forms of terrain. If they survive the return fire, these guys are very quick and will be able to speed around to score objectives for you. I don't think these guys are as necessary as the first 3 levels, but it does bear mentioning. You could also include units like Breachers mounted in Devilfish that provide a counter-charge once the frontline falls.
Think of it this way. Your troops should get deadlier the deeper into your territory the opponent pushes. This protects your most important units while punishing an opponent that tries to get into your lines.
1) Riptides - this build takes advantage of the competitive pricing and massed firepower of the T'au bogeyman. Many T'au players are reliving the glory days of 7th and bringing multiple Riptides to the field and finding great success in that. These lists will be built around 2-3 Riptides with a lot of drones for Savior Protocols, Markerlight support and typically a commander or two for Kau'yon and Command and Control Node. This really ups the damage output of the Riptide and its native BS4+. Kau'yon will get you an average of 75% hits and CnCN will let you reroll wounds on a S6 weapon. Throw in Markerlights, a Branched Nova Charge, some shield drones and screens...your opponent is going to have a bad day. There's a great article over on Frontline Gaming detailing a build that goes all in on this version of the list. The gist of the list are three Riptides, several Broadsides, shield drones, and Shadowsun to call Kau'yon twice. What you get with this style of firebase is a highly mobile, highly survivable list with ways to overcome average BS stats.

2) Hammerheads - the beauty of this style of list is that it is able to easily overcome some of the innate weaknesses of T'au shooting (average BS) and reach BS2+ very easily. This style of firebase will be based around Longstrike and 3 Hammerheads which will provide you with that 2+ BS. Longstrike's aura is fantastic for an armored list and with some Markerlight support, a fairly static list can hit on close to 97% of your shots. This list is largely independent of the need of Kau'yon, leaving commanders free to go out and attack at the flanks. My recommendation (sadly) is to go with the Ion Cannon over the signature Railgun. The new profile provides consistent damage output and a decent rate of fire. The Railgun, unfortunately, just isn't there. Smart Missiles and Seeker Missiles are almost essential upgrades in my opinion. The Smart Missiles provide good volume fire at range while ignoring cover AND line of sight. Seeker Missiles on the other hand are just a cheap single shot that can knock several wounds off an important target early. For 5 points apiece, I find this an easy include if points are available and an easy cut if I need to make points.
It's my firm belief that T'au are in an excellent place post-FAQ and Codex Release. Truth be told, T'au had good options in the Index but they were typically eclipsed by the efficiency of the Commander Spam lists. That's not really the case anymore as we have a variety of army builds that can take T'au out of the middle tables and into contention for the Top 8 slots at GTs. I didn't even mention Forgeworld options but one player took 2 Tigershark Fighter Bombers (imagine two A-10 close support aircraft) to a 5th place finish at the Alamo GT recently. Most of the top lists are following this formula of Screening units plus a strong Firebase and riding that to success, however the pieces that are used to accomplish this tend to vary between armies.Screens
Even with the changes to reserves, screening is still going to be incredibly important for establishing board presence and preventing your opponent from getting close to your firebase. The name of the game here is Infantry. The T'au Empire has really good options when it comes to affordable Troops and mobile infantry units, so what I'm going to recommend here is a setup much like an onion with layers...or an Ogre if you prefer (Shrek anyone?).Starting with your firebase and radiating out, you should have:
1) Strike Teams - these guys will be in tight with the big stuff. They're providing a combination of For the Greater Good and board spacing to keep deep strikers out of your DZ. They're solid units in their own right, a good combination of potent firepower, buffs and price make these guys an attractive option for filling out battalions and holding your home objectives.

2) Scouts - this is where your Kroot and Pathfinders come into play. Their pregame 7" move is fantastic for pushing the frontline out and forcing your opponent to engage cheap skirmishers rather than your expensive units. We're largely talking in terms of close combat and mid range shooting. Lascannons and long range shooting are going to be the weapons that will most likely cause T'au headaches. (Hint: build your shell and eliminate their ranged shooting, it'll probably be a good day if you're forcing the opponent to engage your troops in their zone than in yours.) These guys are a filler force. They're trying to be the link between your Infiltrators and the firebase, a latticework of board control that forces your opponents into certain areas.

3) Infiltrators - by far my favorite pieces, this is where your Stealth Suits and Ghostkeels fall. These units can deploy very far forward, on the edge of the opponent's DZ in the case of the Stealth Suits. As I mentioned above, they're insanely hard to remove for a unit of their statline. Opponents typically don't realize this and won't devote nearly enough shooting to get rid of them. On the flip side, the Ghostkeel will almost certainly draw a lot of fire Turn 1. My opponents remember the Optimized Stealth Cadre from 7th edition and attempt to remove the scary stealth monster as soon as possible. Equip it with a Shield Generator and deploy it midboard and you'll have a very tanky unit that will take up the center of the board and likely eat the majority of your opponent's shots turn 1. In Summary, these guys will hold the frontlines much longer than they have any right to (-1 to hit and 2+ save in cover for the Stealths), and will block off big stretches of battlefield for several turns.
4) Deep Strikers and Sweepers - I think this is where Vespid fall. These guys won't be part of your initial deployment but will arrive Turn 2 to fill in for your scouts that have likely been shot up Turn 1. Not only do they have a devastating counter punch when moderately supported, but they're infantry so will gain the benefit of cover from being in Ruins and most other forms of terrain. If they survive the return fire, these guys are very quick and will be able to speed around to score objectives for you. I don't think these guys are as necessary as the first 3 levels, but it does bear mentioning. You could also include units like Breachers mounted in Devilfish that provide a counter-charge once the frontline falls.
Think of it this way. Your troops should get deadlier the deeper into your territory the opponent pushes. This protects your most important units while punishing an opponent that tries to get into your lines.
Firebase
This is a very important part of the T'au list and can come in multiple varieties. T'au have the benefit of having some very fast moving units that also put out a withering hail of fire, but also excel if a more stationary list is desired such as in the case of Dal'yth or to a different extent, T'au. The firebase will come in a few flavors but there are two prominent builds that have risen above the rest at tournaments. There's a bit of a hybrid model as well but typically your firebases will be built around:1) Riptides - this build takes advantage of the competitive pricing and massed firepower of the T'au bogeyman. Many T'au players are reliving the glory days of 7th and bringing multiple Riptides to the field and finding great success in that. These lists will be built around 2-3 Riptides with a lot of drones for Savior Protocols, Markerlight support and typically a commander or two for Kau'yon and Command and Control Node. This really ups the damage output of the Riptide and its native BS4+. Kau'yon will get you an average of 75% hits and CnCN will let you reroll wounds on a S6 weapon. Throw in Markerlights, a Branched Nova Charge, some shield drones and screens...your opponent is going to have a bad day. There's a great article over on Frontline Gaming detailing a build that goes all in on this version of the list. The gist of the list are three Riptides, several Broadsides, shield drones, and Shadowsun to call Kau'yon twice. What you get with this style of firebase is a highly mobile, highly survivable list with ways to overcome average BS stats.

2) Hammerheads - the beauty of this style of list is that it is able to easily overcome some of the innate weaknesses of T'au shooting (average BS) and reach BS2+ very easily. This style of firebase will be based around Longstrike and 3 Hammerheads which will provide you with that 2+ BS. Longstrike's aura is fantastic for an armored list and with some Markerlight support, a fairly static list can hit on close to 97% of your shots. This list is largely independent of the need of Kau'yon, leaving commanders free to go out and attack at the flanks. My recommendation (sadly) is to go with the Ion Cannon over the signature Railgun. The new profile provides consistent damage output and a decent rate of fire. The Railgun, unfortunately, just isn't there. Smart Missiles and Seeker Missiles are almost essential upgrades in my opinion. The Smart Missiles provide good volume fire at range while ignoring cover AND line of sight. Seeker Missiles on the other hand are just a cheap single shot that can knock several wounds off an important target early. For 5 points apiece, I find this an easy include if points are available and an easy cut if I need to make points.
In Summary

With all the upheaval in the game right now and with the rapid pace of Codex releases, I wouldn't be surprised if some other archetypes begin to make their way to the forefront. I've been playing around with the idea of a Devilfish mounted Breacher assault force out of Vior'la that takes advantage of massed infantry. Preliminary testing of a T'au infantry list is actually terrifying in how much of the board it can occupy and how many shots it can put out.
I hope this provides you with some good ideas about how to approach a T'au army from the competitive side of things. This list is by no means exhaustive but seems to be a good indicator of where the Meta is right now. Keep in mind that with the T'au, Necron and Drukhari releases, the tournament scene has taken a huge Meta shift towards Xenos armies. The Alamo GT had 8 of the Top 10 players piloting Xenos lists, for instance. This will evolve over time as more Codices (Codexes?) release so be proactive and try new things often. Don't let complacency creep up on you.
Thanks for reading and until next time, Tau'va Shas'Os.
If you enjoyed this article and others like it, please leave us a comment here or on our Facebook page - Battle Brother of the GCWA. Be sure to subscribe to our podcast on iTunes and podOmatic for Competitive 40K discussions and your Gulf Coast 40K news.


